Dealing with a malfunctioning air conditioner can be a source of frustration, especially during scorching weather. Before reaching out to professional services, there are essential steps you can take to troubleshoot and potentially resolve the issue. This guide outlines four crucial steps to follow when your air conditioner is not working, providing you with a systematic approach to identify and address common problems.
Read also 5 Steps to Diagnose a Non-Working Air Conditioner at Home >>>
1. Check the Thermostat:
Your thermostat serves as the command center for your air conditioning system, regulating temperature and ensuring comfort. When your air conditioner is not working as expected, the thermostat is a primary component to inspect. Here’s a comprehensive guide on why and how to check the thermostat, along with the benefits of keeping it in optimal condition.
Inspect Settings:
Begin by checking the thermostat settings to ensure they align with your comfort preferences. Verify that the thermostat is set to the desired temperature and mode (cooling). Simple mistakes, like an accidental setting change, can lead to perceived AC malfunctions.
Calibration Verification:
Thermostat calibration is crucial for accurate temperature readings. Use a separate thermometer to compare the displayed temperature on the thermostat. If there’s a significant discrepancy, recalibrate the thermostat or consider professional calibration services.
Battery Assessment:
Some thermostats operate on batteries, and a low battery can impact performance. Regularly check and replace the batteries to guarantee uninterrupted functionality. Most modern thermostats display a low battery indicator when replacements are necessary.
Dust and Debris Removal:
Over time, dust and debris can accumulate around the thermostat, affecting its sensors and responsiveness. Gently clean the thermostat and its surrounding area using a soft brush or compressed air to ensure optimal performance.
Benefits of Checking the Thermostat:
- Energy Efficiency: A properly calibrated thermostat ensures that your air conditioner operates efficiently, reducing unnecessary energy consumption.
- Consistent Comfort: Accurate thermostat settings translate to a consistent indoor temperature, providing comfort and preventing temperature fluctuations.
- Cost Savings: By regularly checking and maintaining your thermostat, you contribute to cost savings on energy bills, as your AC operates more efficiently.
Taking the time to check and maintain your thermostat is a proactive step in ensuring the overall health of your air conditioning system. It’s a straightforward yet impactful measure that enhances energy efficiency, promotes consistent comfort, and extends the lifespan of your HVAC equipment. Regular thermostat checks should be part of your routine HVAC maintenance to enjoy optimal cooling performance.
2. Inspect the Air Filter:
Your air conditioner’s performance is intricately tied to the condition of its air filter. Neglecting the air filter can lead to a range of issues, from reduced efficiency to potential system malfunctions. Let’s delve into why inspecting the air filter is crucial, along with tips on how to do it effectively and the benefits it brings.
Routine Examination:
Regularly inspecting the air filter is a fundamental aspect of air conditioner maintenance. The air filter is responsible for trapping dust, debris, and pollutants, preventing them from circulating through your home. Over time, the filter accumulates these particles, leading to reduced airflow and efficiency.
Cleaning or Replacement:
Depending on the type of air filter your system uses, you may need to either clean or replace it. Disposable filters should typically be replaced every 1-3 months, while reusable filters can be cleaned and reinstalled. Check your manufacturer’s guidelines for specific recommendations.
Improved Air Quality:
A clean air filter contributes to better indoor air quality by capturing and removing airborne particles. This is especially important for individuals with allergies or respiratory conditions, as a clogged filter can worsen these health issues.
Enhanced Efficiency:
A clean air filter allows for optimal airflow through the system. When the filter is clogged, the air conditioner must work harder to push air through, resulting in increased energy consumption and reduced overall efficiency. Regular inspection ensures your system operates at peak performance.
Extended System Lifespan:
Maintaining a clean air filter reduces the strain on your air conditioner’s components. This, in turn, can contribute to an extended lifespan for your HVAC system. Regular inspections and filter replacements are cost-effective measures compared to major repairs or premature system replacement.
Benefits of Inspecting the Air Filter:
- Energy Savings: A clean air filter improves efficiency, leading to energy savings and lower utility bills.
- System Protection: Regular inspections protect your HVAC system from unnecessary wear and tear, potentially preventing costly repairs.
- Healthier Environment: Clean air filters promote a healthier indoor environment by reducing the presence of allergens and pollutants.
Make inspecting and maintaining your air filter a routine part of your HVAC care. Doing so not only ensures a comfortable living space but also contributes to the longevity and efficiency of your air conditioning system.
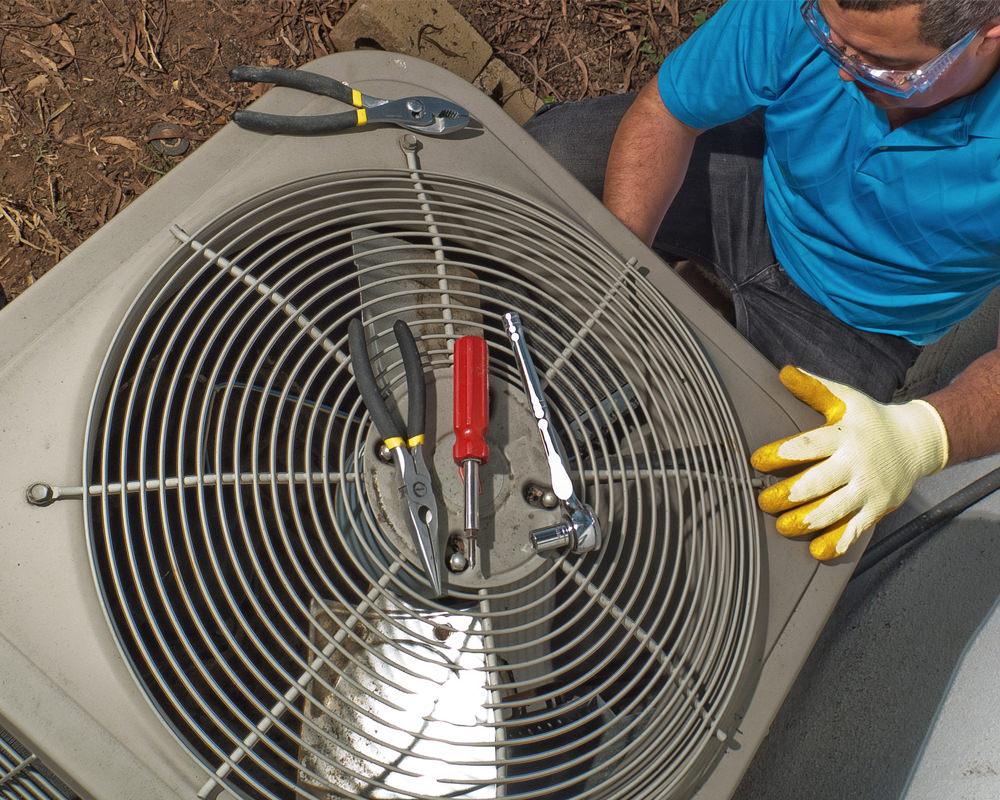
3. Examine the Condenser Unit:
The condenser unit plays a pivotal role in your air conditioning system, responsible for releasing heat absorbed from inside your home to the outside environment. When your air conditioner is not working optimally, a malfunctioning condenser unit could be the culprit. Let’s explore the importance of examining the condenser unit, along with essential tips and the benefits it brings to your HVAC system.
Clear Debris and Obstructions:
Start by visually inspecting the condenser unit for any debris, leaves, or obstructions around the exterior. The condenser needs unobstructed airflow to efficiently release heat. Remove any accumulated debris and ensure a clear space around the unit.
Inspect Fins and Coils:
The condenser fins and coils are integral components for heat exchange. Examine them for any damage, bending, or dirt accumulation. Gently straighten any bent fins using a fin comb and clean the coils with a soft brush or compressed air to maintain optimal performance.
Check for Refrigerant Leaks:
Inspect the condenser unit for any signs of refrigerant leaks. Leaks can negatively impact the cooling efficiency of your air conditioner and contribute to further damage. If you detect leaks, it’s advisable to seek professional assistance for refrigerant recharging and leak repairs.
Secure Electrical Connections:
Ensure all electrical connections to the condenser unit are secure and free from corrosion. Faulty electrical connections can disrupt the proper functioning of the unit and may lead to system malfunctions.
Benefits of Examining the Condenser Unit:
- Optimized Cooling Performance: A well-maintained condenser unit ensures efficient heat exchange, contributing to optimal cooling performance.
- Prevent Overheating: Regular examinations help prevent the condenser unit from overheating, reducing the risk of system breakdowns and costly repairs.
- Extended System Lifespan: Proper maintenance of the condenser unit contributes to the longevity of your air conditioning system, minimizing the need for premature replacements.
Regularly examining the condenser unit is a proactive measure to ensure the overall health and efficiency of your air conditioning system. By addressing issues promptly and keeping the unit well-maintained, you contribute to a reliable and long-lasting HVAC setup for your home.
4. Inspect the Refrigerant Levels:
Refrigerant is the lifeblood of your air conditioning system, responsible for absorbing and releasing heat to maintain a comfortable indoor temperature. When your air conditioner is not working as expected, inadequate refrigerant levels could be a contributing factor. Let’s delve into why inspecting refrigerant levels is crucial, along with essential tips and the benefits it brings to your HVAC system.
Signs of Low Refrigerant:
Before inspecting refrigerant levels, it’s essential to recognize potential signs of low refrigerant. These may include insufficient cooling, ice buildup on the refrigerant lines, and hissing sounds near the indoor unit. If you notice any of these symptoms, it’s indicative of a potential refrigerant issue.
Visual Inspection and Leaks:
Begin by visually inspecting the refrigerant lines and connections for any signs of leaks. Leaking refrigerant not only affects system efficiency but also poses environmental and health risks. If you observe oil stains or hissing sounds, it’s crucial to address the leaks promptly.
Professional Assistance for Refilling:
Inspecting and refilling refrigerant levels is a task best left to professionals. Handling refrigerants requires specialized knowledge and equipment to ensure safe and accurate refilling. Professional HVAC technicians can assess the system, identify leaks, and replenish refrigerant levels to manufacturer specifications.
Benefits of Inspecting Refrigerant Levels:
- Efficient Cooling: Proper refrigerant levels are essential for efficient heat exchange, ensuring your air conditioner cools your home effectively.
- System Longevity: Regular inspections and maintenance of refrigerant levels contribute to the extended lifespan of your HVAC system by preventing excessive strain on components.
- Energy Savings: A well-maintained refrigerant system operates more efficiently, leading to energy savings and lower utility bills.
Regularly inspecting and maintaining optimal refrigerant levels is a critical aspect of air conditioner care. By addressing refrigerant issues promptly and relying on professional assistance, you contribute to a reliable and energy-efficient HVAC system for your home.
Common DIY Mistakes to Avoid:
While taking a DIY approach to address issues with your air conditioner can be tempting, it’s essential to proceed with caution to prevent potential complications. Here, we highlight common DIY mistakes to avoid when troubleshooting your AC system, along with tips on how to navigate these challenges for a successful outcome.
- Overlooking Safety Precautions:
- Mistake: Neglecting safety precautions such as turning off power before inspection.
- Tip: Always prioritize safety. Turn off the power supply to your HVAC system before attempting any DIY tasks to avoid electrical accidents.
- Incorrect Diagnosis:
- Mistake: Jumping to conclusions without a thorough diagnosis of the issue.
- Tip: Take the time to investigate and identify the root cause of the problem before attempting any repairs. Misdiagnosing can lead to unnecessary expenses and ineffective solutions.
- Inadequate Cleaning Practices:
- Mistake: Using harsh cleaning agents or improper tools during maintenance.
- Tip: Stick to manufacturer-recommended cleaning solutions and tools. Harsh chemicals or abrasive materials can damage components, reducing the efficiency of your system.
- Refrigerant Mishandling:
- Mistake: Attempting to handle refrigerant without proper knowledge and equipment.
- Tip: Refrigerant handling requires specialized skills. Leave refrigerant-related tasks, such as refilling or fixing leaks, to licensed HVAC professionals to ensure safety and compliance.
- Ignoring Manufacturer Guidelines:
- Mistake: Disregarding the manufacturer’s guidelines for maintenance and repairs.
- Tip: Always refer to the manufacturer’s manual for your specific AC unit. Following guidelines ensures that you are using the correct procedures and tools for maintenance.
Benefits of Avoiding DIY Mistakes:
- Enhanced Safety: By avoiding common DIY mistakes, you reduce the risk of accidents and injuries during the troubleshooting and repair process.
- Effective Solutions: A careful and accurate approach leads to more effective solutions, addressing the root cause of the AC issue rather than just symptoms.
- Cost Savings: Preventing mistakes can save you from incurring additional costs for repairs or replacements that may result from DIY errors.
While DIY maintenance can be rewarding, it’s crucial to approach it with knowledge and caution. If in doubt, or if the issue is beyond your expertise, seeking professional HVAC assistance ensures the best outcomes for your air conditioning system.
Signs It’s Time to Call a Professional:
While DIY maintenance is valuable, certain signs indicate that it’s time to enlist the expertise of a professional HVAC technician. Recognizing these signs can prevent further damage, ensuring prompt and effective solutions for your air conditioning system. Here are key indicators that it’s time to call in the professionals:
- Insufficient Cooling:
- Sign: The AC is running, but your home remains uncomfortably warm.
- Why Professional Help is Needed: Insufficient cooling may be due to various issues, including refrigerant leaks, compressor problems, or air duct blockages. Professional technicians can diagnose the specific problem and implement targeted solutions.
- Unusual Sounds:
- Sign: Strange noises like grinding, banging, or screeching during AC operation.
- Why Professional Help is Needed: Unusual sounds can indicate issues with the fan, motor, or other internal components. A professional assessment is crucial to identify and address the source of these noises.
- Frequent Cycling On and Off:
- Sign: The AC frequently turns on and off in short cycles.
- Why Professional Help is Needed: This could be due to issues with the thermostat, refrigerant levels, or a malfunctioning component. Professional technicians have the expertise to diagnose and fix the underlying problem.
- Water Leaks:
- Sign: Water pooling around the AC unit or visible leaks indoors.
- Why Professional Help is Needed: Water leaks may stem from a clogged drain, frozen evaporator coil, or a refrigerant issue. Professionals can identify the cause and prevent further water damage.
- Foul Odors:
- Sign: Unpleasant odors emanating from the vents during AC operation.
- Why Professional Help is Needed: Foul smells may indicate mold growth, burnt wiring, or other issues within the HVAC system. Professional technicians can identify and address the source of the odors safely.
Benefits of Calling a Professional:
- Accurate Diagnosis: Professionals can accurately diagnose complex issues, ensuring effective and long-lasting solutions.
- Safety Assurance: HVAC technicians adhere to safety protocols, minimizing risks associated with electrical components and refrigerants.
- Timely Repairs: Prompt professional intervention prevents minor issues from escalating, minimizing downtime and discomfort.
Recognizing the signs that warrant professional assistance ensures the longevity and efficiency of your air conditioning system. When in doubt or faced with persistent issues, seeking the expertise of HVAC professionals is the most prudent course of action.
FAQ Section:
- Q: Can a dirty air filter cause my AC to stop working? **A: Yes, a dirty air filter restricts airflow, leading to reduced cooling efficiency and potential system shutdown.
- Q: How often should I replace my air filter? **A: It’s recommended to replace or clean your air filter every 1-3 months, depending on factors like usage and filter type.
- Q: Why is the condenser unit important? **A: The condenser unit expels heat from your home. Obstructions or debris can hinder this process, affecting overall AC performance.
- Q: What are signs of low refrigerant levels? **A: Insufficient cooling, ice buildup on refrigerant lines, and hissing sounds may indicate low refrigerant levels.
- Q: How can I safely check the thermostat settings? A: Ensure the power is off, then inspect and adjust the thermostat settings as needed. If uncertain, consult your thermostat manual or seek professional help.
Conclusion:
By following these four steps and understanding the common mistakes to avoid, you can troubleshoot your air conditioner effectively. Remember, when in doubt or if issues persist, seeking professional assistance ensures a comprehensive diagnosis and timely resolution. Keep your home cool and comfortable with these actionable steps.